Thursday, September 28, 2017

Developing Technical Competencies

Exposure

This week we learned about the exposure triangle which consists of the ISO, aperture and shutter speed. It is placed in a triangle because as soon as you change one element, you need to compromise it with another.

Picture
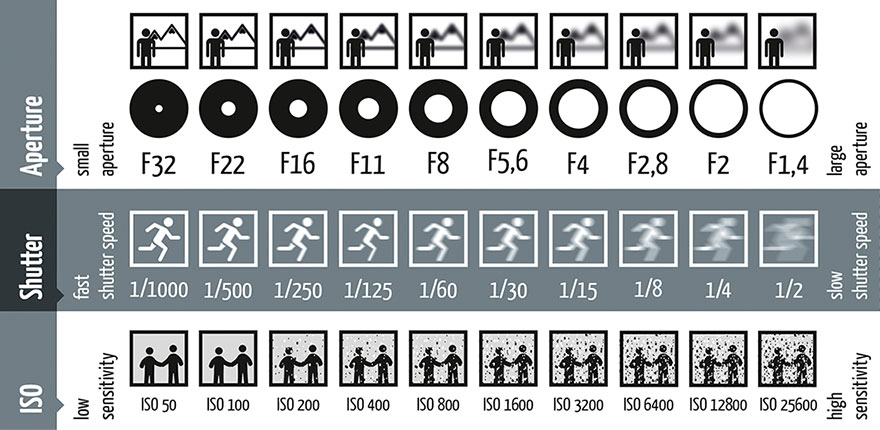
The Exposure Triangle

ISO is the sensitivity to light and is a bit like a pair of sunglasses, this affects the graininess of an image. 

Image result for iso photography

As you can see, in the picture with an ISO of 3200, the picture turns extremely grainy as compared to the picture with ISO 100. I think the best ISO value, in this case, is 800 because it has good lighting and isn't too grainy.

Aperture is the size of the hole which lets light through and is a bit like a window, this affects the depth of field

Related image

Related image

From these two pictures, we can see that with a high aperture (f2.8), the background is blurred, the focus point is high and the depth of field is shallow. With a high aperture, our focus is turned to the first peg instead of the background. In the second picture that has a small aperture (f16), the background is clear, the focus point is equal and the depth of field is deep. We can use this photo below to help us:

Related image


Shutter speed is how long the camera sensor lets light in and is a bit like a curtain, this affects the sharpness of a photo. This is mostly used to capture moments that happen really quickly like jumping into a puddle, jumping down the stairs etc. and is mostly used in sports photography.

Image result for shutter speed

In this photo, we can see that with a slow shutter speed, our camera is unable to focus on a fast-moving object like a windmill. As the shutter speed increases, it freezes actions and allows the camera to focus on the windmill very clearly.

Finally, here's a photo that summarises everything I have learnt today about exposure.

Image result for aperture

Frame Rate

The frame rate is the number of individual frames taken at every second of the video. The most common frame rates for video recording are around 30 frames per second. A higher frame rate means that the video is smoother whilst a lower frame rate means that the video is more jerky. 

Image result for frame rate

Many people cannot differentiate between frame rate and shutter speed- they think that the shutter speed is the frame rate. For example, if your shutter speed is 1/200th of a second, they think that they are taking 200 frames per second. This concept is wrong. 

Shutter speed is how long you are exposing each frame to light per individual frame
Frame rate is how many individual frames you are taking per second of the video

A good way to remember how to adjust your shutter speed according to your frame rate is that the shutter speed should generally be double the number of frames per second. For example, if you are recording at 30 frames per second, you would adjust your shutter speed to be about 1/60th of a second. However, you do not have to do this at all times because by playing around with the shutter speed, you can achieve varying effects. 

Cinema FV5

Cinema FV5 is the name of the Android app we will be using to practice filming and possibly also use to film. I watched a video linked here: https://www.youtube.com/watch?v=K1FfucjbgmU to help me learn how to use this app. Here are some screenshots I took whilst watching the video to help guide me in the future.

This is what the start screen looks like

This is what happens when you click record- on the top left corner, there is a bar showing whether or not it is picking up audio and on the right, it shows how long it has been filming for.

Some settings that need to be ticked for the best recording quality:

Use camera compatibility

Lock exposure during recording; lock white balance during recording

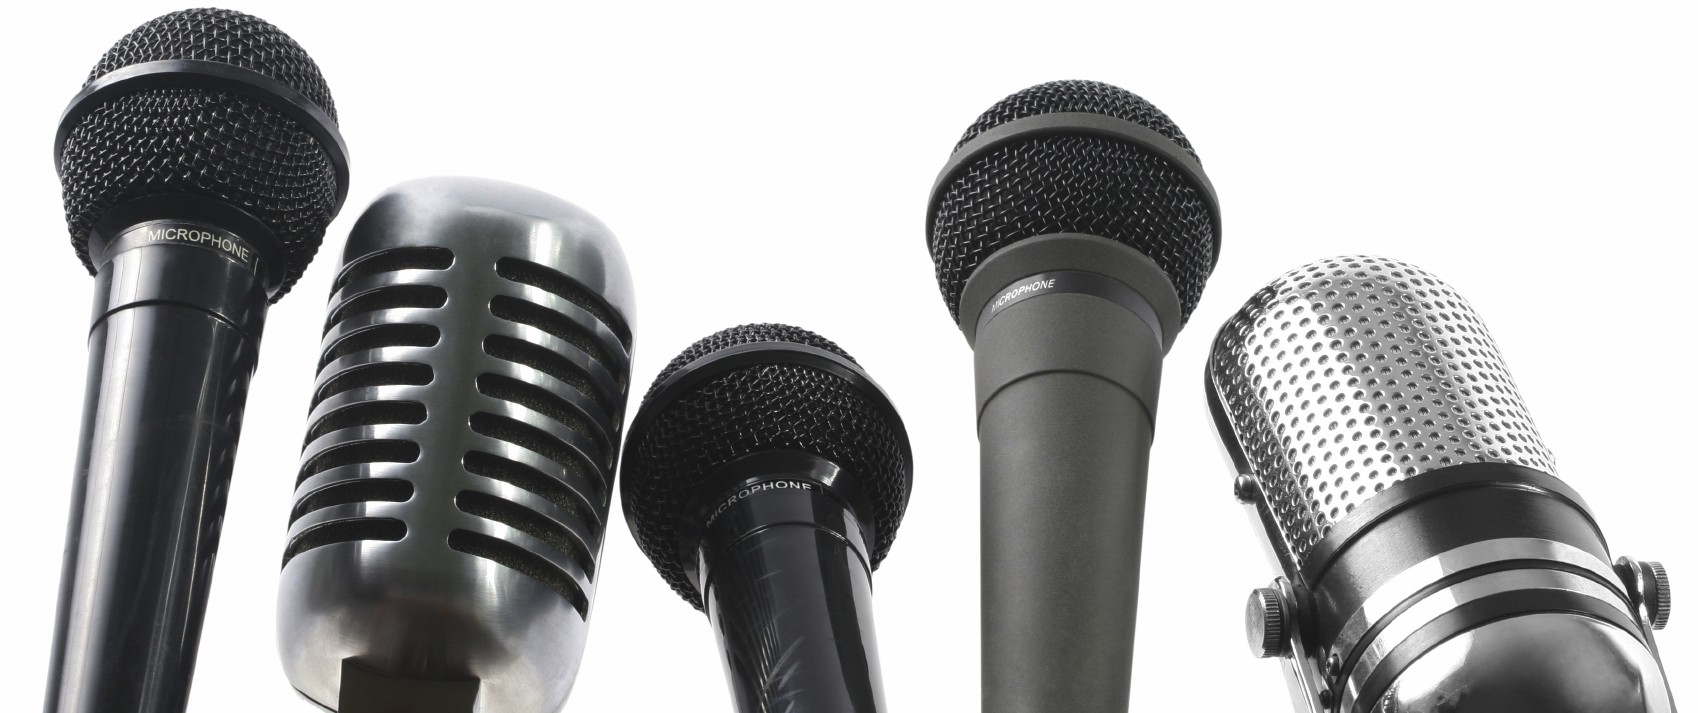
Choosing the correct audio source

Checking the audio settings- set it as follows

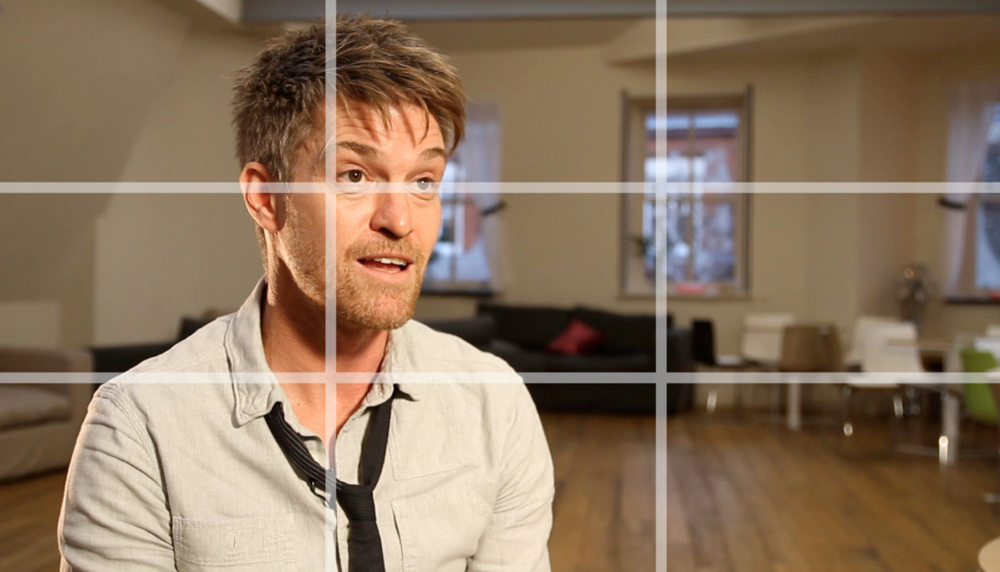
You can choose different display modes- for example, the grid for the rule of thirds

You can choose the white balance- choose auto

You can choose the focus- choose the one where you can click on the screen to focus

Aims and Objectives

Identifying and Setting Objectives

Before setting my own aims and objectives, I learnt about the differences between an aim and an objective. An aim is something general, broad and strategic while an objective is something that is specific, clearly defined, allows aims to be achieved. Next, I took the short quiz that tested my knowledge of differentiating between an aim and an objective. This was my result:


My Aims and Objectives
1. Interview Filming
Aim: To film an interview in a way that can show my technical competencies and appeal to the audience

Objectives:
  • Use a variety of shot angles effectively like wide, medium, close-up etc.
  • Compose my shots using the rule of thirds
  • Film using a tripod so that all footage will be steady
  • Film in a quiet place so that there will be close to no background noise
  • Have appropriate headroom in footage
  • Ensure the audio in the interview is usable and clear
  • Make sure the interviewee is not looking directly at the camera
  • Have the correct settings (white balance, exposure, contrast) on my camera/phone 

    2. B-Roll Filming
    Aim: To make the video more engaging and appealing using B-roll footage

    Objectives:
    • To film B-roll in suitable and topic-related places: e.g. the sea
    • To vary the amount of B-roll and A-roll footage in the final video
    • Use a variety of shots angles during the filming of B-roll
    • Have the correct settings (white balance, exposure, contrast) on my camera/phone 
    • Avoid shaky or blurry footage
    3. Organization and Preparation of Equipment
    Aim: To have the correct equipment that is of high quality and will be able to take high-quality footage

    Objectives:
    • To follow my pre-filming checklist
    • Download the recommended app and use it
    • To have and use a tripod
    • To have and use a filming camera that will be borrowed from the school (or phone)
    • To have and use a microphone (possibly a lavalier) that will be borrowed from the school
    • To use the microphone in close proximity and obtain clear audio
    • If equipment needs to be borrowed from the school- make sure to book it earlier and that it is available for use
    4. Audio Recording
    Aim: To always have clear audio throughout the whole video

    Objectives:
    • To always record in a quiet environment
    • To use microphones while filming most of the time
    • To record in close proximity
    • If doing voiceovers, make sure the speaker is loud and clear, so that it can be of the best quality possible
    Collaborative Dispositions
    3 Dispositions I am good at currently from the GREEN section


    3 Dispositions that is important for my role from the BLUE section


    2 Dispositions I need to work on in group situations from the RED section


    Thursday, September 21, 2017

    Planning Interviews

    Planning Interviews

    For this task, to start off, we had to watch three videos that gave us information on some basics on how to film an interview.

    The first video gave us the basics and talked about:
    - Make sure it is a quiet environment with not a lot of background noise
    - Have good lighting to make the subject seem more alive and to make it more engaging
    - The interviewee should never look at the camera but at the interviewer
    - Send the interviewee a list of questions prior so that they can prepare

    Image result for interview filming

    The second video explained about bounce lighting:
    - Avoid harsh shadows under your eyes so that you can see the subject clearly- fix this by using bounce lighting (reflectors)
    - Reflectors help disperse light and fill in the shadows, this has to be done by another person
    - Play around with your reflectors to get the best angle
    - You don't need to use a reflector- you can use paper, umbrellas and even pizza boxes

    Related image

    The third video talked about:
    - Always be prepared before an interview: learn everything you can about your subject, prepare a list of questions that are open-ended to allow articulate answers, make sure you have suitable equipment (camera, tripod, lavalier microphone)
    - In the interview, make sure you have thought about your shot angle (wide, medium, close-up) and your composition (rule of thirds)
    - Closer shots add intensity while wider shots are more relaxed
    - Try to make sure your interviewee is not directly looking at the camera lens
    - Prepare your lighting set-up with a reflector

    Image result for rule of thirds interview
    Rule of thirds in an interview and not looking directly at the camera

    My next task is to create a checklist that I will be able to use to help me plan, organize equipment and the shooting I will do. 

    Paperwork
    - Interview questions: interviewer has read through them and knows them, remember to bring spares
    - Emails with the organization that contains the address, person to contact etc.: to make sure the whole interview process goes smoothly

    Equipment
    - Camera: make sure it has a full battery, clean lens and it works!
    - Tripod: try fitting it on the camera and that it works properly
    - Batteries: bring spares and make sure they are all charged so that if one fails, we will always have another one
    - Microphones: make sure they are connected/can connect to the camera and there are windshields and other accessories if needed
    - Storage media: ensure that the camera has more storage (SD card) than what you actually need
    - Weather protection: depending on the weather, make sure there is suitable protection for the equipment, e.g. it is raining, bring a cover for the camera
    - Earphones: to check the audio during filming to make sure it is of good quality
    - Phone: the backup camera if the camera fails to operate, make sure it has a charged battery and there is enough storage left to be able to take a good amount of photos and videos.

    Microphones and Recording Sound

    Understanding Microphones and Recording Sound


    For this task, we had to watch two videos that briefly explained the basics of microphones and then take a short quiz that tested our understanding of the use of microphones in different circumstances.

    The links to the video are here:
    https://isle.island.edu.hk/mod/page/view.php?id=54594- proximity effect
    https://isle.island.edu.hk/mod/page/view.php?id=54595- equipment tutorial

    Firstly, I watched a video talking about proximity and how this affects the quality of sound depending on what type of microphone you are using and the environment you are in. The narrator talked about how important it is to make sure you think about proximity whilst buying/using microphones. I have learnt that the best type of microphone to use for interviews are handheld dynamic microphones because they are inexpensive, does not pick up extra sound from around the room and they have a good sound quality. Something that he emphasized was that you can't fix sound in post, meaning that if you have recorded bad sound in the first place, you will not be able to fix this during editing.

    Related image


    The second video explained in detail on the types of microphones, polar patterns, and which type of microphone in what situations. I learnt that there are two main types of microphones, dynamic and condensers. All microphones are either dynamic or a condenser. For example, a handheld microphone is dynamic while a microphone for recording a song in a studio are condensers. Dynamic microphones are cheaper, more durable, less sensitive and self-powered while condensers are more expensive, fragile, highly sensitive and require phantom power. 

                                           Image result for microphones types

    Afterwards, the video explained about polar patterns- diagrams that show a microphone's sensitivity. The types of polar patterns include omnidirectional (from all directions), bi-directional (from the front and back), cardioid (front) and super cardioid (highly sensitive from the front but can still pick up some sounds from the back). The narrator also explained how you have to think about the microphone's polar patterns and if it is suitable or not for the situation you are filming in.  

                                           Related image

    Finally, I took the test which I passed after two attempts. I found the test to be quite helpful since it basically helped me to summarise everything I learnt and told me what things I would need to revisit and research more on. 

    Thursday, September 14, 2017

    Composition and Camera Movement

    Composition and Camera Movement

    Framing and Focusing:
    For this subtopic, we had to watch two videos that were linked on ISLE that explained different forms of framing and focusing techniques. For example, the long shot is a shot that shows a human from head to toe and gives a clear view of the nearby surroundings; a cutaway is when you interrupt a continuously filmed action to give a view of something else related; a pull focus is when you change focus from one subject to another; an extreme close-up is when you tightly frame a person or an object in order to show their emotions and precise actions. These are just a few of the framing and focusing techniques I have learnt while watching the videos, a complete list can be found in the picture below.
    Image result for types of shots and angles
    Summary of camera shots, angles and movement

    Image result for extreme wide shot
    Example of a wide shot

    Image result for high angle shot
    Example of a high angle shot to show vulnerability

    Other than framing and focusing, there was another video that focused mainly on the rule of thirds. This video taught us how to recognise shots containing the rule of thirds and the different types of thirds there are. For example, there are horizontal thirds, 2/3:1/3 ratio which is suitable for moving objects etc.

    Image result for rule of thirds
    Example of vertical rule of thirds

    Camera Movement:
    For this subtopic, we had to watch this video in order to understand the basics of camera movements and give me some ideas on why I would need to move the camera during filming. For example, I learnt about the pan movement, which is when you look left and right, the tilt movement, which is when you move up and down and the track movement, which is when you track a moving subject.

    Image result for camera movement
    Summary of the camera movements technique

    I think these three things are extremely important to my role because this can help me take better shots when filming and fulfil the responsibility of learning how to take shots. Without these two basic skills and knowledge, I will be unable to produce high-quality content.

    After learning the basics, we had to complete a test on camera shots and composition to see how much we understood. I passed the test on my first attempt, getting over 80% (although the screenshot does not display my grade)

    Production Technician: Roles & Responsibilities

    Roles and Responsibilities of a Production Technician

    Being a production technician includes:
    - Developing knowledge on the technicalities of filming a video
    - Getting filming and audio recording skills
    - Understanding things like exposure, focus, white balance, lighting etc.
    - Understanding how to take shots: compositions, being creative
    - Understanding the process of getting good audio quality: choosing and using the best microphones
    - Understanding the differences between A-roll and B-roll and the importance of both

    My role is very important to the final documentary because a lot of it will depend on how I complete my role and the quality of the things I do.


    Looking Back

    Looking Back on Last Year

    My strengths last year were that I did good self-assessments, as well as being able to complete my responsibilities as an information designer because my graphics were of a good quality that enhanced the video and linked well to the topic of hunger. In my blog, I showed my creative processes clearly.

    My weaknesses last year were that in my evaluation and comments, I talked about things other than my role like the video. To improve, I was suggested to make annotations in my evaluation directly relating to the video, for example, I could say, "At 1:30 in the video..."

    I think my assessment and my teacher assessment's were similar because we both agreed on the things I needed to work on. 

    My targets for my work this year:
    • To manage my time better so I will not cram everything into the last week or so 
    • To produce excellent quality of work, and since I am production technician this year, I am aiming to be able to have stable shots with good composition
    • To get all the cross-cultural perspectives needed- i.e. more than one interview